Indian cuisine, with its emphasis on beans, lentils, and a wide variety of vegetables, lends itself naturally to vegetarian and vegan diets. Curries, daals, dishes with heavy sauce and don't forget the naan...
But wait! There's much more to Indian food than the well-known dishes from the northern part of the country (some of which weren't even invented in India!). Chitra Agrawal wants to introduce home chefs to the glorious, diverse cuisine of Southern India, which is similar in some ways to what we already know and love but different in many others. Southern Indian dishes tend to be much heavier on rice and lentils than northern meals. Spice mixtures are different. Dishes use tamarind instead of green mango. Even the chai is made differently.
Vibrant India pays homage to the food Agrawal grew up with in Bangalore, adapted slightly as necessary for cooks in America. The pages of this gorgeous cookbook are full of exciting new recipes that are just begging to be made: curries (such as Karnataka Coconut Vegetable Curry), salads (Cucumber, Sprouted Mung Bean, and Pomegranate Salad), rice (Fragrant Eggplant and Green Pepper Rice), stews (Black-Eyed Peas, Greens, and Lentil Stew), sweets (Banana, Coconut, and Cardamom Ice Cream), and more. At the end, readers will find a chapter on DIY spice blends, and there are even instructions for making your own chutneys and pickles.
Scattered throughout the recipes are gorgeous (and delicious!) color photographs of some of the dishes, as well as artwork featuring animals and Indian motifs. Agrawal includes fun tidbits of family history, to help readers feel immersed in Indian culture and cuisine. Don't feel intimidated by the recipes; most look much more complex than they actually are, and once you've tried a few recipes, the methods and ingredient lists won't look nearly as daunting.
Vibrant India is a great cookbook for vegetarians, vegans, and omnivores alike. Get ready to try something new!
*****
I received this book from Blogging for Books in exchange for an honest review. The opinions expressed within are completely my own.
Showing posts with label vegan. Show all posts
Thursday, December 21, 2017
Friday, November 27, 2015
Review: Food52 Vegan
For a long time, vegan cooking tended to fall to one of two extremes: bland dishes filled with unusual grains and hard-to-find vegetables, or recipes that used copious amounts of faux meats and "cheeze" in an attempt to recreate non-vegan favorites.
Thankfully, those days are long past. Modern vegan cookbooks are full of vibrant flavors and bright colors, shining the spotlight on a wide variety of vegetables and utilizing minimally-processed alternative protein sources. These kinds of cookbooks help us vegans remember why we went that route in the first place: because food doesn't need animal products in order to be delicious and diverse. Indeed, vegans today have a wide array of amazing cookbooks at their disposal, each filled with recipes more tempting than the last.
And while there are plenty of good cookbooks out there already, there are always room for more. Thus, vegans everywhere will surely revel in the pages of Food52 Vegan, which are filled with plenty of new recipes to fuel meal plans for weeks to come. Gena Hamshaw has been writing a column on veganism for foodie website Food52 for years, and this cookbook offers a lovely selection of favorites from the column plus plenty of brand new ideas.
Food52 Vegan contains the usual spread of recipe categories: Breakfast, Soups, Main Dishes, and so forth. Each chapter is packed with delicious-sounding recipes. Enjoy Tempeh and Sweet Potato Hash for breakfast (or dinner, for that matter), have a bowl of Smoky Black Bean and Sweet Potato Chili for lunch, and snack on Parsnip Fries with Spicy Harissa Mayonnaise in the afternoon. Dine on Kabocha Squash and Tofu Curry for dessert, and finish off your day with a few pieces of Cranberry Pistachio Biscotti and a cup of coffee.
Each recipe comes a headnote that will make you hungry, and the recipe directions are clear and easy to follow. Gorgeous photographs are sprinkled throughout the text; most of the recipes are accompanied by a picture. Not only do these recipes sound amazing, but readers will be pleased to see that most can easily be made using ingredients available at the local grocery store; once your pantry is stocked with the essentials, only the occasional trip to the nearest Whole Foods or other health food store will be necessary.
Above all, pick up Food52 Vegan with plans of getting hungry and finding something yummy to eat. You will not be disappointed.
***
I received this book from the Blogging for Books program in exchange for an honest review. All opinions expressed are my own!
Thankfully, those days are long past. Modern vegan cookbooks are full of vibrant flavors and bright colors, shining the spotlight on a wide variety of vegetables and utilizing minimally-processed alternative protein sources. These kinds of cookbooks help us vegans remember why we went that route in the first place: because food doesn't need animal products in order to be delicious and diverse. Indeed, vegans today have a wide array of amazing cookbooks at their disposal, each filled with recipes more tempting than the last.
And while there are plenty of good cookbooks out there already, there are always room for more. Thus, vegans everywhere will surely revel in the pages of Food52 Vegan, which are filled with plenty of new recipes to fuel meal plans for weeks to come. Gena Hamshaw has been writing a column on veganism for foodie website Food52 for years, and this cookbook offers a lovely selection of favorites from the column plus plenty of brand new ideas.
Food52 Vegan contains the usual spread of recipe categories: Breakfast, Soups, Main Dishes, and so forth. Each chapter is packed with delicious-sounding recipes. Enjoy Tempeh and Sweet Potato Hash for breakfast (or dinner, for that matter), have a bowl of Smoky Black Bean and Sweet Potato Chili for lunch, and snack on Parsnip Fries with Spicy Harissa Mayonnaise in the afternoon. Dine on Kabocha Squash and Tofu Curry for dessert, and finish off your day with a few pieces of Cranberry Pistachio Biscotti and a cup of coffee.
Each recipe comes a headnote that will make you hungry, and the recipe directions are clear and easy to follow. Gorgeous photographs are sprinkled throughout the text; most of the recipes are accompanied by a picture. Not only do these recipes sound amazing, but readers will be pleased to see that most can easily be made using ingredients available at the local grocery store; once your pantry is stocked with the essentials, only the occasional trip to the nearest Whole Foods or other health food store will be necessary.
Above all, pick up Food52 Vegan with plans of getting hungry and finding something yummy to eat. You will not be disappointed.
***
I received this book from the Blogging for Books program in exchange for an honest review. All opinions expressed are my own!
Friday, November 20, 2015
All About CSAs
Many, many years ago, I joined my first community supported agriculture (CSA) program. I was pretty new to the idea, but I loved the thought of getting veggies and fruits from a small, local farm. I've been a vegetarian for a long time, so getting boxes of fresh produce every week seemed like a smart idea.
So what exactly is it? CSA stands for community supported agriculture. In a CSA program, you are essentially buying a short-term share of the farm. Members pledge up front to support the farm financially for a certain period of time, and in return they receive a weekly "dividend" of locally-grown, freshly-harvested produce. The farm, on the other hand, gets capital up front to pay for plants/seeds, fertilizer, water, and other farm needs. It's a win-win situation.
People join a CSA for a number of reasons. For many, locally-grown food is a big draw; when your food hasn't traveled very far to get to you, it lessens your overall carbon footprint. Others are interested in eating seasonally. Some are specifically looking for organic goods. Some want to support a small business. Others just want the convenience of having a big box of produce packaged up for them!
Since that first CSA so many years ago, I've been a member of a number of others in various locations throughout the country. If you're considering finding a CSA of your own, there are a number of things to consider during your research.
What do they grow?
Well, they mostly grow vegetables and fruit. But what kinds, specifically? Nowadays, most CSA programs offer a general list on their website of what kinds of produce they grow. Sometimes, this is organized by season: we have apples in the fall, salad greens and citrus fruits in the winter, etc.. Sometimes, it'll be month-by-month, or with some kind of fancy chart listing their "normal" produce down the side, months at the top, and check marks for which months that particular food is usually available. Many have a link on their website (or Facebook page) listing the contents of the current week's box, so you can always check up on that for a few weeks to get an idea of what kinds of crops they have. If they don't list what they grow on their site, be sure to contact the farmer or organizer for more information! Most CSAs send out weekly emails detailing the contents of the box, and farmers are happy to compile a list of prior examples for potential members.
A lot of CSAs pride themselves on offering "unusual" types of produce. CSAs were where I was first introduced to pomegranates, kohlrabi, fennel, jujubees, mulberries, banana squash, and more. Other CSAs prefer to offer more of a "normal" selection: spinach, salad greens, apples, tomatoes, zucchini, green beans, etc. Checking out their offerings ahead of time makes it easier to determine whether or not the things they grow are a good fit for your family.
In addition to vegetables and fruits, some CSAs offer a wide variety of other goodies. Some farms might grow tree nuts and include a bag when in season. Other items I've found in my boxes in the past include dry beans, dry (local!) rice, popcorn kernels, bundles of herbs, herb seedlings to plant at home, even jams and pickles made by the farmer! Farms that offer eggs for sale might give you a free half-dozen when they have a surplus.
Do you like what they grow?
It doesn't do any good to have all those fresh vegetables and fruits in your crisper drawers if many of them are ones your family won't actually eat! Certainly, one of the joys of CSAs is that they might introduce you to new foods and inspire you to try out new ways of cooking ones you're already familiar with. But what if your CSA sends out two or three bags of different salad greens in every box, and your family just doesn't like that much salad? What if you get a dozen oranges per delivery during citrus season, but you can't stand peeling them or having your hands smell like orange for the rest of the day? What if you're allergic to cantaloupe or watermelon or strawberries? What if you just flat-out hate okra? Some CSAs offer a certain amount of customization (and they are much more likely to be amenable to deletions or exchanges if you have food allergies), but most just pack every box with the same contents. If the farm you're looking at grows a lot of things you simply don't like or can't/won't eat, it might not be a good fit for you.
When do they operate?
In some parts of the country, CSA farms operate and offer produce boxes year-round, but in others you might only be able to find spring and summer programs. It totally depends on the climate, the size of the farm, and what all they grow. When considering different farms for CSA membership, be sure to know exactly how their growing schedule meshes with your needs.
How often do they deliver?
Most CSAs offer weekly boxes. Some offer bi-weekly (every other week), which might be a better fit depending on your family's eating habits. Almost all are perfectly happy to let you cancel or skip your box for the week (usually due to vacation), so long as you provide proper notice ahead of time.
How do you actually get your box?
While some CSAs do in fact deliver straight to your door, members usually pay a premium for this service. Much more common is the idea of a drop point or pick-up location. All the boxes for a general area are delivered to one location (sometimes a store or farmers' market, but more often a personal home, usually one with plenty of shade or an accessible garage so that the contents will stay cool and fresh until picked up). Members know when their delivery date is, and the boxes are generally guaranteed to be there by a certain time, so that you can plan for the best time to pick it up. Some CSAs prefer to have these pick-up locations staffed; you will know that your boxes are available on a particular day during a specific time period (usually a few hours), and you are expected to pick it up then.
How often do you pay?
For many small farmers, one of the biggest appeal of having a CSA program is getting money up-front to pay the bills, as it were. Your dues pay for the costs of operating a farm. For this reason, many CSAs require members to pay seasonally or quarterly. At the very least, you can expect to be required to pay monthly; week-to-week is not particularly sustainable for the farmer, and it makes planning and packing boxes hard. Some may offer yearly or bi-yearly (six months at a time) memberships. In general, the price-per-box is less when you pay for longer periods of time up-front.
How much does it cost? And how much do you get for your money?
Some CSAs offer only one size of box, usually enough to feed an average family (4-ish people). Some might offer a smaller box, suitable for a married couple without kids, or larger boxes for larger families. I have even seen "individual" CSA boxes.
Some CSAs will give you the dimensions of the different box sizes, while others might compare them to a standard-size paper grocery bag (or two). Others might instead give an estimated number of items in each week's box.
Do I have to return the empty box?
Those cardboard delivery boxes can be expensive, and different CSAs handle delivery boxes in different ways. Some might send the box home with you, but ask that you bring back the empty box from the prior week with each new delivery. If this is the case, they will ask you to do your best to treat the box gently so that it can be reused over and over again. Others might expect you to transfer your produce to a box or bag of your own on the spot, leaving the initial delivery box behind so that they'll be able to reuse them right away. Your CSA should make it clear from the beginning what their expectations are. (And it is worth your while to obey these directives! When too many boxes are lost or destroyed too quickly, it may drive up your CSA dues in the future.)
Are there add-ons available?
Many small farms also have chickens, and a weekly egg share is a common add-on to many CSA boxes; for an additional fee, you can add a dozen or half dozen eggs to every box, or every other box. Some farms also can provide meat or milk, so be sure to look into this if it interests you! Some might simply offer turkeys at Thanksgiving, while others might have cow-share programs or offer raw dairy (either openly or on the down-low, depending on what the laws are like in your state).
I have been a member of a number of CSAs that offer additional items for an additional fee, paid either ahead of time (they'll come in your next scheduled box) or at the site of pick-up. Perhaps you can get extra bags of blueberries or strawberries when they're in season, or nuts, or local honey. These items might be grown on your CSA farm, or they might be for sale through a collaborative effort with another local farm. If you're interested in preserving, many farms will offer bulk discounts on certain items when they're in season; think of tomatoes for canning, berries for jams, cucumbers for pickling.
Do they offer community events?
Many small farms delight in hosting community events for their members. These may include seasonal potlucks or parties, you-pick style harvest events, family pumpkin patches, or regular farm tours. If you are interested in your membership going beyond just getting your box of goodies every week, then see what kinds of events go on at your farm! These kinds of events may be member-only, while others may be open to others by invitation. Some might even be public events, open to anyone who is interested in checking out the farm.
Are they certified organic?
For many people interested in CSAs, one of the biggest draws is getting produce that is organic. Many small farms know this. If organic is important to you, it is definitely worth asking about about up front. But it's also important to know that being certified USDA organic by the government is an expensive and time-consuming process. Many small farms might not have the resources to actually be certified, or they might not yet have had the time to work through all the requisite paperwork, but that doesn't necessarily mean they don't use organic practices on their farm. Ask! Most farmers are happy to discuss their farming practices with you. Do they use pesticides? Is it indiscriminately sprayed on everything, or is it a last-resort-type of option? Do they stick to herbicides that are acceptable within organic practices? Do they avoid GMO crops? (For many, this might be one of the biggest reasons to go organic!) Get to know your farmer and they way they manage their fields!
So how do I find one?
Hands down, the best way to find a CSA near you is through Local Harvest. This handy website allows you to search for farms and other sources of local food by zip code or city. You can find basic information about the farm and their CSA program here, as well as reviews; follow through to the farm's own website for more details.
Another great way to find CSA programs near you is to check out the local farmers' market; many small farms will have a weekly market booth, and you can find out information about their CSA and even interview the farmer on the spot, if you desire. And there's always Google, of course; a search for "CSA +yourcity" will no doubt give you some options.
***
Have you ever been a member of a CSA? What did you like (or dislike) about it?
***
This post is shared at the Happy, Healthy, Green, & Natural Party Blog Hop on 11/16/2015.
So what exactly is it? CSA stands for community supported agriculture. In a CSA program, you are essentially buying a short-term share of the farm. Members pledge up front to support the farm financially for a certain period of time, and in return they receive a weekly "dividend" of locally-grown, freshly-harvested produce. The farm, on the other hand, gets capital up front to pay for plants/seeds, fertilizer, water, and other farm needs. It's a win-win situation.
People join a CSA for a number of reasons. For many, locally-grown food is a big draw; when your food hasn't traveled very far to get to you, it lessens your overall carbon footprint. Others are interested in eating seasonally. Some are specifically looking for organic goods. Some want to support a small business. Others just want the convenience of having a big box of produce packaged up for them!
Since that first CSA so many years ago, I've been a member of a number of others in various locations throughout the country. If you're considering finding a CSA of your own, there are a number of things to consider during your research.
What do they grow?
Well, they mostly grow vegetables and fruit. But what kinds, specifically? Nowadays, most CSA programs offer a general list on their website of what kinds of produce they grow. Sometimes, this is organized by season: we have apples in the fall, salad greens and citrus fruits in the winter, etc.. Sometimes, it'll be month-by-month, or with some kind of fancy chart listing their "normal" produce down the side, months at the top, and check marks for which months that particular food is usually available. Many have a link on their website (or Facebook page) listing the contents of the current week's box, so you can always check up on that for a few weeks to get an idea of what kinds of crops they have. If they don't list what they grow on their site, be sure to contact the farmer or organizer for more information! Most CSAs send out weekly emails detailing the contents of the box, and farmers are happy to compile a list of prior examples for potential members.
A lot of CSAs pride themselves on offering "unusual" types of produce. CSAs were where I was first introduced to pomegranates, kohlrabi, fennel, jujubees, mulberries, banana squash, and more. Other CSAs prefer to offer more of a "normal" selection: spinach, salad greens, apples, tomatoes, zucchini, green beans, etc. Checking out their offerings ahead of time makes it easier to determine whether or not the things they grow are a good fit for your family.
In addition to vegetables and fruits, some CSAs offer a wide variety of other goodies. Some farms might grow tree nuts and include a bag when in season. Other items I've found in my boxes in the past include dry beans, dry (local!) rice, popcorn kernels, bundles of herbs, herb seedlings to plant at home, even jams and pickles made by the farmer! Farms that offer eggs for sale might give you a free half-dozen when they have a surplus.
![]() |
| In the winter, your CSA just might inundate you with hard squashes. This is a good problem to have. |
Do you like what they grow?
It doesn't do any good to have all those fresh vegetables and fruits in your crisper drawers if many of them are ones your family won't actually eat! Certainly, one of the joys of CSAs is that they might introduce you to new foods and inspire you to try out new ways of cooking ones you're already familiar with. But what if your CSA sends out two or three bags of different salad greens in every box, and your family just doesn't like that much salad? What if you get a dozen oranges per delivery during citrus season, but you can't stand peeling them or having your hands smell like orange for the rest of the day? What if you're allergic to cantaloupe or watermelon or strawberries? What if you just flat-out hate okra? Some CSAs offer a certain amount of customization (and they are much more likely to be amenable to deletions or exchanges if you have food allergies), but most just pack every box with the same contents. If the farm you're looking at grows a lot of things you simply don't like or can't/won't eat, it might not be a good fit for you.
When do they operate?
In some parts of the country, CSA farms operate and offer produce boxes year-round, but in others you might only be able to find spring and summer programs. It totally depends on the climate, the size of the farm, and what all they grow. When considering different farms for CSA membership, be sure to know exactly how their growing schedule meshes with your needs.
How often do they deliver?
Most CSAs offer weekly boxes. Some offer bi-weekly (every other week), which might be a better fit depending on your family's eating habits. Almost all are perfectly happy to let you cancel or skip your box for the week (usually due to vacation), so long as you provide proper notice ahead of time.
How do you actually get your box?
While some CSAs do in fact deliver straight to your door, members usually pay a premium for this service. Much more common is the idea of a drop point or pick-up location. All the boxes for a general area are delivered to one location (sometimes a store or farmers' market, but more often a personal home, usually one with plenty of shade or an accessible garage so that the contents will stay cool and fresh until picked up). Members know when their delivery date is, and the boxes are generally guaranteed to be there by a certain time, so that you can plan for the best time to pick it up. Some CSAs prefer to have these pick-up locations staffed; you will know that your boxes are available on a particular day during a specific time period (usually a few hours), and you are expected to pick it up then.
How often do you pay?
For many small farmers, one of the biggest appeal of having a CSA program is getting money up-front to pay the bills, as it were. Your dues pay for the costs of operating a farm. For this reason, many CSAs require members to pay seasonally or quarterly. At the very least, you can expect to be required to pay monthly; week-to-week is not particularly sustainable for the farmer, and it makes planning and packing boxes hard. Some may offer yearly or bi-yearly (six months at a time) memberships. In general, the price-per-box is less when you pay for longer periods of time up-front.
How much does it cost? And how much do you get for your money?
Some CSAs offer only one size of box, usually enough to feed an average family (4-ish people). Some might offer a smaller box, suitable for a married couple without kids, or larger boxes for larger families. I have even seen "individual" CSA boxes.
Some CSAs will give you the dimensions of the different box sizes, while others might compare them to a standard-size paper grocery bag (or two). Others might instead give an estimated number of items in each week's box.
![]() |
| Encourage your entire family to eat more veggies! Join a CSA today! |
Do I have to return the empty box?
Those cardboard delivery boxes can be expensive, and different CSAs handle delivery boxes in different ways. Some might send the box home with you, but ask that you bring back the empty box from the prior week with each new delivery. If this is the case, they will ask you to do your best to treat the box gently so that it can be reused over and over again. Others might expect you to transfer your produce to a box or bag of your own on the spot, leaving the initial delivery box behind so that they'll be able to reuse them right away. Your CSA should make it clear from the beginning what their expectations are. (And it is worth your while to obey these directives! When too many boxes are lost or destroyed too quickly, it may drive up your CSA dues in the future.)
Are there add-ons available?
Many small farms also have chickens, and a weekly egg share is a common add-on to many CSA boxes; for an additional fee, you can add a dozen or half dozen eggs to every box, or every other box. Some farms also can provide meat or milk, so be sure to look into this if it interests you! Some might simply offer turkeys at Thanksgiving, while others might have cow-share programs or offer raw dairy (either openly or on the down-low, depending on what the laws are like in your state).
I have been a member of a number of CSAs that offer additional items for an additional fee, paid either ahead of time (they'll come in your next scheduled box) or at the site of pick-up. Perhaps you can get extra bags of blueberries or strawberries when they're in season, or nuts, or local honey. These items might be grown on your CSA farm, or they might be for sale through a collaborative effort with another local farm. If you're interested in preserving, many farms will offer bulk discounts on certain items when they're in season; think of tomatoes for canning, berries for jams, cucumbers for pickling.
Do they offer community events?
Many small farms delight in hosting community events for their members. These may include seasonal potlucks or parties, you-pick style harvest events, family pumpkin patches, or regular farm tours. If you are interested in your membership going beyond just getting your box of goodies every week, then see what kinds of events go on at your farm! These kinds of events may be member-only, while others may be open to others by invitation. Some might even be public events, open to anyone who is interested in checking out the farm.
| One CSA I was a member of hosts an annual winter vendor festival, where you can pick up extra produce and holiday gifts at the same time! |
Are they certified organic?
For many people interested in CSAs, one of the biggest draws is getting produce that is organic. Many small farms know this. If organic is important to you, it is definitely worth asking about about up front. But it's also important to know that being certified USDA organic by the government is an expensive and time-consuming process. Many small farms might not have the resources to actually be certified, or they might not yet have had the time to work through all the requisite paperwork, but that doesn't necessarily mean they don't use organic practices on their farm. Ask! Most farmers are happy to discuss their farming practices with you. Do they use pesticides? Is it indiscriminately sprayed on everything, or is it a last-resort-type of option? Do they stick to herbicides that are acceptable within organic practices? Do they avoid GMO crops? (For many, this might be one of the biggest reasons to go organic!) Get to know your farmer and they way they manage their fields!
So how do I find one?
Hands down, the best way to find a CSA near you is through Local Harvest. This handy website allows you to search for farms and other sources of local food by zip code or city. You can find basic information about the farm and their CSA program here, as well as reviews; follow through to the farm's own website for more details.
Another great way to find CSA programs near you is to check out the local farmers' market; many small farms will have a weekly market booth, and you can find out information about their CSA and even interview the farmer on the spot, if you desire. And there's always Google, of course; a search for "CSA +yourcity" will no doubt give you some options.
***
Have you ever been a member of a CSA? What did you like (or dislike) about it?
***
This post is shared at the Happy, Healthy, Green, & Natural Party Blog Hop on 11/16/2015.
Wednesday, November 4, 2015
Pumpkin Bread
It seems like southern California has finally gotten the memo about the change in seasons.
It's officially been autumn for more than a month, but we were still seeing temperatures in the 80s and 90s for pretty much all of October. But apparently, now that it's November, the weather has finally caught up.
A few nights ago, we had a glorious thunder storm. I was overjoyed. Ecstatic. Giddy. Seriously, though, every time the lightning flashed, I ran over to my husband so I could share how ridiculously happy I was. I fell asleep to the sound of rain soaking the drought-stricken ground.
Of course, the fact that the weather has, until just recently, been hot hasn't stopped me from getting my autumn baking on. I've been making cookies, muffins, beer bread, and plenty of pumpkin goodies. And now that I've finally gotten around to baking the culinary pumpkin I picked up at one of San Diego's many pumpkin patches, we'll be eating pumpkin everything for some time to come.
I've made pumpkin bread three times within the past few weeks. I think I've finally perfected my recipe, after changing things pretty much every time I make it. This is bread has the perfect texture, is sweet enough without being sickeningly sweet, egg-free, and absolutely delicious.
1½ c flour
½ tsp salt
½ c sugar
1 tsp baking soda
½ tsp baking powder
¼ tsp nutmeg
1 tsp cinnamon
¼ tsp allspice
¼ tsp cloves
equivalent of 2 eggs (or just use actual eggs if that's how you swing)
1 c pumpkin puree
¼ c applesauce
¼ c oil
drizzle of maple syrup (optional)
½ c chopped nuts (optional)
Preheat oven to 350° F. Sift together flour, salt, sugar, baking soda, baking powder, and spices. In a separate bowl, combine pumpkin, applesauce, oil, egg replacer*, and maple syrup, if using. Combine with dry ingredients and mix until just moistened. Fold in nuts. Pour into greased loaf pan. Bake 50-60 minutes.
*I am currently using Orgran brand egg replacer, so I mix the powder (2 tsp for the equivalent of 2 eggs) in with my dry ingredients, then add the necessary water (1/4 c in this case) to my wet ingredients. I have also made this with ground flax in the past, in which case I'd mix both the flax (2 tbsp for the equivalent of 2 eggs) and the water (6 tbsp) in with the wet ingredients.
| October should not be this warm. |
It's officially been autumn for more than a month, but we were still seeing temperatures in the 80s and 90s for pretty much all of October. But apparently, now that it's November, the weather has finally caught up.
A few nights ago, we had a glorious thunder storm. I was overjoyed. Ecstatic. Giddy. Seriously, though, every time the lightning flashed, I ran over to my husband so I could share how ridiculously happy I was. I fell asleep to the sound of rain soaking the drought-stricken ground.
Of course, the fact that the weather has, until just recently, been hot hasn't stopped me from getting my autumn baking on. I've been making cookies, muffins, beer bread, and plenty of pumpkin goodies. And now that I've finally gotten around to baking the culinary pumpkin I picked up at one of San Diego's many pumpkin patches, we'll be eating pumpkin everything for some time to come.
I've made pumpkin bread three times within the past few weeks. I think I've finally perfected my recipe, after changing things pretty much every time I make it. This is bread has the perfect texture, is sweet enough without being sickeningly sweet, egg-free, and absolutely delicious.
Pumpkin Bread
1½ c flour
½ tsp salt
½ c sugar
1 tsp baking soda
½ tsp baking powder
¼ tsp nutmeg
1 tsp cinnamon
¼ tsp allspice
¼ tsp cloves
equivalent of 2 eggs (or just use actual eggs if that's how you swing)
1 c pumpkin puree
¼ c applesauce
¼ c oil
drizzle of maple syrup (optional)
½ c chopped nuts (optional)
Preheat oven to 350° F. Sift together flour, salt, sugar, baking soda, baking powder, and spices. In a separate bowl, combine pumpkin, applesauce, oil, egg replacer*, and maple syrup, if using. Combine with dry ingredients and mix until just moistened. Fold in nuts. Pour into greased loaf pan. Bake 50-60 minutes.
*I am currently using Orgran brand egg replacer, so I mix the powder (2 tsp for the equivalent of 2 eggs) in with my dry ingredients, then add the necessary water (1/4 c in this case) to my wet ingredients. I have also made this with ground flax in the past, in which case I'd mix both the flax (2 tbsp for the equivalent of 2 eggs) and the water (6 tbsp) in with the wet ingredients.
Tuesday, August 25, 2015
Chocolate Chocolate-Chip Muffins
Ever have one of those days where you just want to eat cupcakes for breakfast?
No? Just me?
Come on, now, be honest. Everyone wants to eat cake for breakfast sometimes, but most of us are too responsible to actually do so. (At least, we are once we're no longer teenagers.) But that's where muffins come in to play.
The last time I announced that I was having chocolate chocolate-chip muffins for breakfast, a friend asked what the difference was between them and a cupcake. Hmm. Lack of frosting, perhaps? These are also just a little bit denser than cupcakes; they don't have that same airy cake feel. On top of that, these muffins have a banana and some applesauce baked into them, which obviously makes them healthy.
So the next time you feel like indulging for breakfast, make yourself some muffins instead!
1¾ c flour
¼ c cocoa powder
1 tbsp baking powder
¼ tsp salt
3 tbsp sugar
1 ripe banana
¼ c applesauce
½ c milk (I use nondairy, but I imagine cow milk would work just as well)
2 tbsp water
1 tsp vanilla extract
1 tsp chocolate extract (optional)
1 tbsp oil
½ c chocolate chips
Preheat oven to 350° F.
Combine dry ingredients in a large bowl and mix well. In a blender (or in a smaller bowl and using an immersion blender), combine banana with applesauce with milk, water, extracts, and oil. Blend until smooth. Mix into dry ingredients until just combined (leave it a bit lumpy!). Gently fold in chocolate chips.
Pour into prepared muffin tins. Bake 20-25 minutes, until a toothpick poked into the middle of one comes out clean (allowing for the fact that sometimes you'll hit a chocolate chip, and that of course won't come out completely clean at all).
***
This post is shared at the Happy, Healthy, Green, & Natural Party Blog Hop on 8/24/2015.
No? Just me?
Come on, now, be honest. Everyone wants to eat cake for breakfast sometimes, but most of us are too responsible to actually do so. (At least, we are once we're no longer teenagers.) But that's where muffins come in to play.
The last time I announced that I was having chocolate chocolate-chip muffins for breakfast, a friend asked what the difference was between them and a cupcake. Hmm. Lack of frosting, perhaps? These are also just a little bit denser than cupcakes; they don't have that same airy cake feel. On top of that, these muffins have a banana and some applesauce baked into them, which obviously makes them healthy.
So the next time you feel like indulging for breakfast, make yourself some muffins instead!
Chocolate Chocolate-Chip Muffins
1¾ c flour
¼ c cocoa powder
1 tbsp baking powder
¼ tsp salt
3 tbsp sugar
1 ripe banana
¼ c applesauce
½ c milk (I use nondairy, but I imagine cow milk would work just as well)
2 tbsp water
1 tsp vanilla extract
1 tsp chocolate extract (optional)
1 tbsp oil
½ c chocolate chips
Preheat oven to 350° F.
Combine dry ingredients in a large bowl and mix well. In a blender (or in a smaller bowl and using an immersion blender), combine banana with applesauce with milk, water, extracts, and oil. Blend until smooth. Mix into dry ingredients until just combined (leave it a bit lumpy!). Gently fold in chocolate chips.
Pour into prepared muffin tins. Bake 20-25 minutes, until a toothpick poked into the middle of one comes out clean (allowing for the fact that sometimes you'll hit a chocolate chip, and that of course won't come out completely clean at all).
***
This post is shared at the Happy, Healthy, Green, & Natural Party Blog Hop on 8/24/2015.
Tuesday, July 7, 2015
Cherry Oat Muffins
What do you do when you want blueberry muffins for breakfast, but are (sadly) out of blueberries?
You substitute cherries, of course!
And then add in a banana. And some oats, for extra breakfast power. And some almond extract, because it complements the cherries so nicely. And change some other things up, just for the fun of it.
We baked up a batch of these for breakfast the other day. They're not super sweet (which is how I prefer my muffins) and they have delicious cherries, which is just perfect for this time of year. Give 'em a try and let me know how you like 'em!
1 c flour (I used a mix of whole wheat and all-purpose)
½ c rolled oats
2 tsp baking powder
1 tsp baking soda
¼ tsp salt
½ - 1 tsp cinnamon (I actually used Penzey's Apple Pie Spice, but whatever)
1 banana (very ripe)
¼ c nondairy milk
¼ c maple syrup (or agave or honey)
1 tsp vanilla extract
½ tsp almond extract
1 tbsp applesauce
1 tbsp oil (I used coconut, but feel free to use whatever you like, or use more applesauce instead)
½ c cherries, chopped
Preheat oven to 350° F.
In a large bowl, mix together dry ingredients (flour through cinnamon).
Use a blender or immersion blender to cream banana with nondairy milk, maple syrup, extracts, applesauce, and oil. Fold into dry ingredients along with chopped cherries; mix until just combined, and be careful not to overmix!
Divide between muffin cups. Bake 18-20 minutes, until cooked all the way through. Let cool a few minutes before eating.
Makes 12 muffins.
***
This post is shared at the Healthy, Happy, Green, & Natural Party Blog Hop on 7/5/2015.
You substitute cherries, of course!
And then add in a banana. And some oats, for extra breakfast power. And some almond extract, because it complements the cherries so nicely. And change some other things up, just for the fun of it.
We baked up a batch of these for breakfast the other day. They're not super sweet (which is how I prefer my muffins) and they have delicious cherries, which is just perfect for this time of year. Give 'em a try and let me know how you like 'em!
Cherry Oat Muffins
1 c flour (I used a mix of whole wheat and all-purpose)
½ c rolled oats
2 tsp baking powder
1 tsp baking soda
¼ tsp salt
½ - 1 tsp cinnamon (I actually used Penzey's Apple Pie Spice, but whatever)
1 banana (very ripe)
¼ c nondairy milk
¼ c maple syrup (or agave or honey)
1 tsp vanilla extract
½ tsp almond extract
1 tbsp applesauce
1 tbsp oil (I used coconut, but feel free to use whatever you like, or use more applesauce instead)
½ c cherries, chopped
Preheat oven to 350° F.
In a large bowl, mix together dry ingredients (flour through cinnamon).
Use a blender or immersion blender to cream banana with nondairy milk, maple syrup, extracts, applesauce, and oil. Fold into dry ingredients along with chopped cherries; mix until just combined, and be careful not to overmix!
Divide between muffin cups. Bake 18-20 minutes, until cooked all the way through. Let cool a few minutes before eating.
Makes 12 muffins.
***
This post is shared at the Healthy, Happy, Green, & Natural Party Blog Hop on 7/5/2015.
Tuesday, June 16, 2015
Review: Fat Free With Me Seasoning Blends
Take a quick look in my spice cabinet and you can tell I love to cook.
I have dozens upon dozens of jars of seasonings. Many are single types of herbs or spices, while many are spice blends. Sure, I have all the usual blends--pumpkin pie, Italian seasoning, curry, garam masala--but I also have a bunch of less common ones, such as apple pie spice (subtly different from the aforementioned pumpkin pie) and frozen pizza seasoning, among others.
I've recently added a handful of new contenders:
The contents of these unassuming vacuum-sealed pouches pack quite a punch!
Fat Free With Me, an online weight-loss program that teaches clients about real food as part of their program, has recently started selling their own seasoning blends, which promise to "change your mind for the better about eating vegetables."
Their seasoning line currently includes eight varieties, four of which will be discussed in more detail here.
First up is Broccoli Chip, a blend of Hawaiian Alaea sea salt and dill (plus a few other spices... what, you didn't really think I'd give out the full ingredient list here, did you?!) that makes broccoli taste pretty darn awesome. Admittedly, I already think broccoli is amazing, but this blend might make it a little more palatable for those who struggle with their vegetable intake. I personally use it most on oven-roasted broccoli (the best way to cook broccoli, in my most humble opinion), but I've also tried it on kale (great on kale chips, less great on sauteed kale), broccoli rabe (yummy!), and cauliflower. One of these days, I intend to try it on roasted green beans too, and I expect the results will be delicious.
Of all of these spice blends, I have used Broccoli Chip the most. It's pretty much like a specialized version of seasoned salt that is especially well-suited to vegetables. My husband loved it too, as did my three-year-old.
Next is Baja Blend, which consists of ancho chiles, black lava sea salt (different blends use different types of salt to better complement the flavors of the other spices), and a variety of "south of the border" spices that, together, create a delicious and spicy flavor perfect for chili and a wide array of meats. I obviously can't comment about whether or not it'd be good on meat, as it's been more than ten years since I went vegetarian, but I will gladly attest to this blend being good in a variety of other ways!
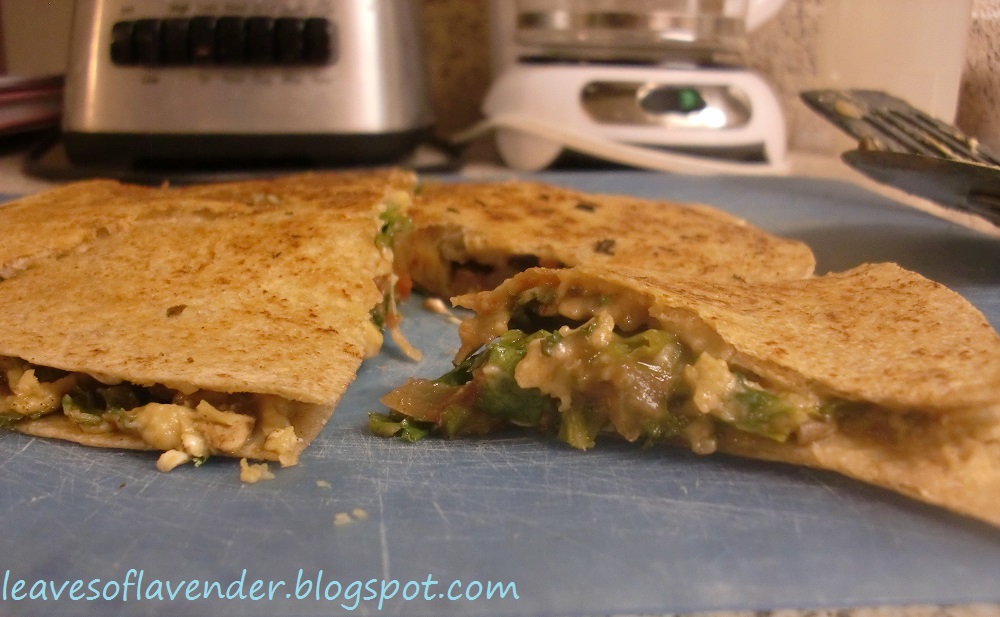
I have indeed added this mix to chili, and I've also used it as the base ingredient for fajita sauce. I can basically see it as a good stand-in for taco seasoning in any context; I imagine it'd be awesome mixed into bean dip or used to season whatever you put into your tacos (I, personally, will always love chickpea tacos, and I bet this would be an amazing way to flavor those beans!). I've also used it on the vegan quesadilla-type things that I often make for lunch, which consist of tortillas, hummus, beans, salsa, and whatever veggies I happen to have on hand.
My entire family seemed to love this blend in every way I experimented with it. I'm looking forward to trying out a few new ways in the coming weeks and months!
Seafood Splash is described as "a sweet/savory spice with just a bit of kick," and is recommended for using with (not surprisingly) various types of seafood. I don't eat seafood, but I didn't let that stop me! I used this blend in a pot of homemade vegetable broth, and I whisked it into a marinade for baked tofu.
Perhaps my favorite way of using this blend (so far, anyway!) is as part of my filling for wraps: mashed chickpeas + (vegan) mayonnaise (hummus would work too) + yellow mustard + a generous dash of Seafood Splash makes a great wrap filling; just add a copious amount of veggies and a whole grain tortilla for a delicious meal.
Last of the blends I tried is Rice Spice. Made of sea salt, garlic, and a whole bunch of other yummy spices, this blend pairs perfectly with grains of all kinds. It's worth experimenting with to find your own perfect proportion of spice to rice (I liked more than the package suggested). Aside from rice, which was quite tasty with this cooked in, Rice Spice also worked great with quinoa and couscous.
I would love to eventually try to turn this blend into some kind of delicious salad dressing. I also think it could make for an amazing risotto, with carrots and some kind of leafy green mixed in. I'm always open to other suggestions, too!
If you're into cooking, I heartily recommend giving some of these seasoning blends a try. I feel like I've barely scratched the surface of their potential, and I am looking forward to continuing to experiment with them. Hopefully some other fun, new recipes are in my future, thanks to these delicious blends from Fat Free With Me!
Note: I received free samples of these spice blends from Fat Free With Me in exchange for an honest review. All opinions expressed in this post are entirely my own!
I have dozens upon dozens of jars of seasonings. Many are single types of herbs or spices, while many are spice blends. Sure, I have all the usual blends--pumpkin pie, Italian seasoning, curry, garam masala--but I also have a bunch of less common ones, such as apple pie spice (subtly different from the aforementioned pumpkin pie) and frozen pizza seasoning, among others.
I've recently added a handful of new contenders:
The contents of these unassuming vacuum-sealed pouches pack quite a punch!
Fat Free With Me, an online weight-loss program that teaches clients about real food as part of their program, has recently started selling their own seasoning blends, which promise to "change your mind for the better about eating vegetables."
Their seasoning line currently includes eight varieties, four of which will be discussed in more detail here.
First up is Broccoli Chip, a blend of Hawaiian Alaea sea salt and dill (plus a few other spices... what, you didn't really think I'd give out the full ingredient list here, did you?!) that makes broccoli taste pretty darn awesome. Admittedly, I already think broccoli is amazing, but this blend might make it a little more palatable for those who struggle with their vegetable intake. I personally use it most on oven-roasted broccoli (the best way to cook broccoli, in my most humble opinion), but I've also tried it on kale (great on kale chips, less great on sauteed kale), broccoli rabe (yummy!), and cauliflower. One of these days, I intend to try it on roasted green beans too, and I expect the results will be delicious.
Of all of these spice blends, I have used Broccoli Chip the most. It's pretty much like a specialized version of seasoned salt that is especially well-suited to vegetables. My husband loved it too, as did my three-year-old.
| Om nom nom. |
Next is Baja Blend, which consists of ancho chiles, black lava sea salt (different blends use different types of salt to better complement the flavors of the other spices), and a variety of "south of the border" spices that, together, create a delicious and spicy flavor perfect for chili and a wide array of meats. I obviously can't comment about whether or not it'd be good on meat, as it's been more than ten years since I went vegetarian, but I will gladly attest to this blend being good in a variety of other ways!
I have indeed added this mix to chili, and I've also used it as the base ingredient for fajita sauce. I can basically see it as a good stand-in for taco seasoning in any context; I imagine it'd be awesome mixed into bean dip or used to season whatever you put into your tacos (I, personally, will always love chickpea tacos, and I bet this would be an amazing way to flavor those beans!). I've also used it on the vegan quesadilla-type things that I often make for lunch, which consist of tortillas, hummus, beans, salsa, and whatever veggies I happen to have on hand.
My entire family seemed to love this blend in every way I experimented with it. I'm looking forward to trying out a few new ways in the coming weeks and months!
Seafood Splash is described as "a sweet/savory spice with just a bit of kick," and is recommended for using with (not surprisingly) various types of seafood. I don't eat seafood, but I didn't let that stop me! I used this blend in a pot of homemade vegetable broth, and I whisked it into a marinade for baked tofu.
Perhaps my favorite way of using this blend (so far, anyway!) is as part of my filling for wraps: mashed chickpeas + (vegan) mayonnaise (hummus would work too) + yellow mustard + a generous dash of Seafood Splash makes a great wrap filling; just add a copious amount of veggies and a whole grain tortilla for a delicious meal.
Last of the blends I tried is Rice Spice. Made of sea salt, garlic, and a whole bunch of other yummy spices, this blend pairs perfectly with grains of all kinds. It's worth experimenting with to find your own perfect proportion of spice to rice (I liked more than the package suggested). Aside from rice, which was quite tasty with this cooked in, Rice Spice also worked great with quinoa and couscous.
I would love to eventually try to turn this blend into some kind of delicious salad dressing. I also think it could make for an amazing risotto, with carrots and some kind of leafy green mixed in. I'm always open to other suggestions, too!
If you're into cooking, I heartily recommend giving some of these seasoning blends a try. I feel like I've barely scratched the surface of their potential, and I am looking forward to continuing to experiment with them. Hopefully some other fun, new recipes are in my future, thanks to these delicious blends from Fat Free With Me!
Note: I received free samples of these spice blends from Fat Free With Me in exchange for an honest review. All opinions expressed in this post are entirely my own!
Tuesday, April 21, 2015
Ideas for Raising Veggie-Loving Kids
Are you one of the many parents out there who worries that their little one is a picky eater?
It seems to be a common refrain. My child just doesn't like vegetables. Or how about this? My son will only eat peas or carrots. Or maybe, The only way my daughter eats veggies is when I sneak them into her meals!
On the flip side, do you ever wonder about those parents who never seem to have that problem? Do you envy parents whose children can be seen digging into unusual cuisines with gusto? Debate how they convince their children to eat asparagus and kale and mushrooms? Maybe it's all luck; they just got a kid who is a "good eater," while you got stuck with one who thinks vegetables and unfamiliar foods are poison.
For the parents who wish there was some way they could gently encourage their children to eat better, take heart! There are steps you can take. None of these will guarantee that your children will turn from a vegetable-hater to a vegetable-lover overnight, but with enough time, they may help to turn the tide.
Perhaps instead of feeding your little one baby food from a jar, or even making your own purees at home, you might consider taking a different approach. Have you ever heard of baby-led weaning? The most basic premise is that you let your little ones feed themselves from the get-go. This means suitably-sized chunks of foods, real foods, the foods you are eating yourself. No purees. No grains or "baby cereals," which babies under a year old generally can't digest properly anyway. (Did you know there's no scientific reason why purees should be first foods? The only real benefit of purees is that it allows you to easily feed your baby "real" foods... perhaps before your baby is physically ready for those foods.) Not only is baby-led weaning an easier, more natural approach to feeding your baby, but it has real benefits for baby too: baby learns to pay attention to his own hunger cues (if he's hungry, he'll keep eating; if he's not, he's not going to have you putting spoonfuls of mush into his mouth anyway), baby learns how to gum and eventually chew different sizes and textures, and baby gets a lot of practice with those fine motor skills.
Remember that baby-led weaning and spoon feeding are mutually exclusive; you can offer your little one chunks of avocado and pumpkin at one meal and then spoonfuls of applesauce at the next. (Maybe consider adding a dash of cinnamon to that applesauce! And don't feel like you need to buy "baby" applesauce, either; any standard brand of no-sugar-added applesauce is perfectly suitable for a baby who is old enough for solids.) The important thing is to expose baby early and often to a wide variety of produce from a young age. And don't shy away from just sharing part of your own dinner when appropriate!
That being said, it's important to keep offering children new foods, even foods that have been soundly rejected in the past. You may need to offer a child a new food 10-15 times before they will eat it. Keep offering, and hopefully they will voluntarily try it (and enjoy it!) eventually.
One example? Pasta sauce, specifically marinara sauce. If you make your own pasta sauce, it is really easy to add all kinds of vegetables to it and then blend the whole thing into a smooth sauce; try adding carrots or parsnips in with the onions and garlic, or a few chunks of cooked butternut squash (for a sweeter flavor overall). Shredded zucchini can be added either before or after blending. With enough time spent simmering, peeled eggplant practically melts into tomato sauce. Finely chopped spinach might leave behind little flecks of green but no awkward taste; other greens might leave a stronger flavor, but one that enhances the final sauce.
Do you see where you can take this? Pureed vegetables of all kinds can easily be baked into breads and muffins. Smoothies are a great place to add extra vegetables; add cooked winter squash, chunks of cooked beets, spinach, cucumber, or other vegetables to a big fruit smoothie and note that the overall taste doesn't really change. Many people add vegetables to meatloaf or meatballs, or even chicken nuggets or hamburgers (although as a vegetarian, I can't really comment on the effectiveness of that!). Add shredded carrots to the pan when making old fashioned or steel cut oats; if your children shy away from it at first, try simply re-branding it as "carrot cake oatmeal," and most kids will happily eat their entire bowl. (Do the same thing with waffles or pancakes, too!)
The point here is that there are a wide variety of different ways to fit vegetables into your child's diet (not to mention your own!). Why limit yourself to vegetables served on their own?
I may be over-analyzing here, but have you ever thought about what message you're sending your kids? Sure, they may not know right now that you've hidden spinach in their smoothie or zucchini in their muffins, but someday they will. And when they do realize it, on some unconscious level they may internalize this message: Vegetables aren't worth eating on their own. If they haven't been eating vegetables and enjoying them for what they are when they're young, they're probably not going to just suddenly doing so when they get older. Hiding vegetables does not teach kids to like vegetables, and it does not teach kids to eat healthy. On some unconscious level, they may believe vegetables don't taste good. Vegetables have a weird texture. Vegetables are not something to snack on, something to voluntarily put on your pizza, or one of the best side dishes at big holiday meals.
Wait a second, you say! What was that you were just saying about sticking veggies in pasta sauce and smoothies? Isn't that hiding them? Remember that while there is nothing wrong with using vegetables creatively, it benefits everyone when your family knows exactly what is in the foods you serve to them. Go ahead and toss a big handful of spinach into the smoothie before blending it; just make sure that you don't keep it a secret from your child. Someday, they may grow to think that all smoothies benefit from a healthy handful of greens!
On another note, am I the only one who feels like hiding veggies in regular foods is pretty close to lying to them? Lying by omission perhaps, but however you want to define it, it is being dishonest. And most parents want their kids to learn that any kind of dishonesty is not okay, no matter how well-meaning.
Another idea? Get your child's input when it comes to what you're making for dinner. Offer them a few choices, but let them actually select the meal. Or try exploring cookbooks together; let them look at the pictures and tell them about what the dish might taste like. If you do meal planning, let them help you select some of the foods you're making every week (within reason, of course!).
Or maybe you could consider joining a CSA (community-supported agriculture) project. Most CSAs offer a box of fresh produce weekly or bi-weekly, delivered either to your door or to a convenient drop location. CSAs also offer a wide variety of produce, freshly-harvested, including more "normal" foods (expect a ton of zucchini in the summer months) as well as less common types (I've been a member of many CSAs over the years, and there are a lot of fruits and veggies I've tried for the first time because they were in my box that week). Kids love unpacking the box every week and seeing what's inside. Parents are determined to use everything and not let anything go to waste, while children are intrigued by exotic produce and (hopefully) want to sample it all.
Farm stands also have a lot to offer; sure, you have to drive to the farm, but you also know that everything was picked fresh. Or look for local u-pick farms, where you can harvest berries or apples or other produce; you have to pick it yourself, but the produce costs less than anything you can buy in a store and tastes much better. Plus, there's something about the process that just draws children in. Make a family event of it!
Getting children involved in gardening has so many benefits. It gets them outside and sets them up for a great hobby. It gives them a great excuse to get dirty. It helps them to work on their patience, since plants take a long time to grow. And by helping to create the food, kids have a vested interest in eating the results. Don't be surprised if your budding gardener is much more likely to eat those veggies he helped nurture.
This post has been shared at the Healthy, Happy, Green, & Natural Party Blog Hop on 4/21/2015.
It seems to be a common refrain. My child just doesn't like vegetables. Or how about this? My son will only eat peas or carrots. Or maybe, The only way my daughter eats veggies is when I sneak them into her meals!
On the flip side, do you ever wonder about those parents who never seem to have that problem? Do you envy parents whose children can be seen digging into unusual cuisines with gusto? Debate how they convince their children to eat asparagus and kale and mushrooms? Maybe it's all luck; they just got a kid who is a "good eater," while you got stuck with one who thinks vegetables and unfamiliar foods are poison.
For the parents who wish there was some way they could gently encourage their children to eat better, take heart! There are steps you can take. None of these will guarantee that your children will turn from a vegetable-hater to a vegetable-lover overnight, but with enough time, they may help to turn the tide.
Eat them yourself.
In America, only about a quarter of adults eat vegetables three or more times per day, and it's recommended that we eat at least five to seven servings per day! Is it any wonder that our children aren't eating enough veggies, either? If you want them to eat more veggies, it is important that you lead by example. Try to have veggies with every meal, if possible (yes, including breakfast!). Make sure your children see you eating them and, perhaps more importantly, enjoying them; if you act like eating veggies is a necessary evil, your little ones are going to pick up on that. So do what it takes to make eating vegetables a positive, normal part of the day.Start 'em young!
Sometimes, I can't help but wonder if the aversion that so many kids feel towards vegetables has roots in their early experiences with food. Think about it. What is the typical first experience with vegetables? Cooked and pureed carrots or peas or some other "early" veggie. Bland and boring, especially if it comes from a jar (at least when you make your own you can ensure that the produce is at the peak of freshness and ripeness). The texture is nothing like that of the carrots they will eventually be expected to eat when they get older. The flavor is probably pretty different too; how often do you eat plain steamed or boiled carrots, no salt, no butter, no seasonings of any kind? (Well, I actually do sometimes, but that's besides the point; most people do not.)Perhaps instead of feeding your little one baby food from a jar, or even making your own purees at home, you might consider taking a different approach. Have you ever heard of baby-led weaning? The most basic premise is that you let your little ones feed themselves from the get-go. This means suitably-sized chunks of foods, real foods, the foods you are eating yourself. No purees. No grains or "baby cereals," which babies under a year old generally can't digest properly anyway. (Did you know there's no scientific reason why purees should be first foods? The only real benefit of purees is that it allows you to easily feed your baby "real" foods... perhaps before your baby is physically ready for those foods.) Not only is baby-led weaning an easier, more natural approach to feeding your baby, but it has real benefits for baby too: baby learns to pay attention to his own hunger cues (if he's hungry, he'll keep eating; if he's not, he's not going to have you putting spoonfuls of mush into his mouth anyway), baby learns how to gum and eventually chew different sizes and textures, and baby gets a lot of practice with those fine motor skills.
Remember that baby-led weaning and spoon feeding are mutually exclusive; you can offer your little one chunks of avocado and pumpkin at one meal and then spoonfuls of applesauce at the next. (Maybe consider adding a dash of cinnamon to that applesauce! And don't feel like you need to buy "baby" applesauce, either; any standard brand of no-sugar-added applesauce is perfectly suitable for a baby who is old enough for solids.) The important thing is to expose baby early and often to a wide variety of produce from a young age. And don't shy away from just sharing part of your own dinner when appropriate!
If at first you don't succeed, try, try again... and again... and again...
Once children hit a certain age, it's pretty common for them to be resistant to trying new foods. There are reasons for this; from an evolutionary standpoint, being a "picky" eater may have once been beneficial to toddlers, keeping them from trying new (and potentially harmful) foods on their own, without a parent's input. Biologically, it's worth noting that younger babies taste bitter and sour flavors more strongly than adults though; they have a natural aversion to bitter or sour foods.That being said, it's important to keep offering children new foods, even foods that have been soundly rejected in the past. You may need to offer a child a new food 10-15 times before they will eat it. Keep offering, and hopefully they will voluntarily try it (and enjoy it!) eventually.
Put them in creative places...
There are so many ways to serve vegetables to your children than just as a side dish. And it can be really easy to add vegetables in foods you're eating all the time anyway in a way that doesn't mar the taste or texture of the final meal.One example? Pasta sauce, specifically marinara sauce. If you make your own pasta sauce, it is really easy to add all kinds of vegetables to it and then blend the whole thing into a smooth sauce; try adding carrots or parsnips in with the onions and garlic, or a few chunks of cooked butternut squash (for a sweeter flavor overall). Shredded zucchini can be added either before or after blending. With enough time spent simmering, peeled eggplant practically melts into tomato sauce. Finely chopped spinach might leave behind little flecks of green but no awkward taste; other greens might leave a stronger flavor, but one that enhances the final sauce.
Do you see where you can take this? Pureed vegetables of all kinds can easily be baked into breads and muffins. Smoothies are a great place to add extra vegetables; add cooked winter squash, chunks of cooked beets, spinach, cucumber, or other vegetables to a big fruit smoothie and note that the overall taste doesn't really change. Many people add vegetables to meatloaf or meatballs, or even chicken nuggets or hamburgers (although as a vegetarian, I can't really comment on the effectiveness of that!). Add shredded carrots to the pan when making old fashioned or steel cut oats; if your children shy away from it at first, try simply re-branding it as "carrot cake oatmeal," and most kids will happily eat their entire bowl. (Do the same thing with waffles or pancakes, too!)
The point here is that there are a wide variety of different ways to fit vegetables into your child's diet (not to mention your own!). Why limit yourself to vegetables served on their own?
...But don't try to hide them.
I know a lot of parents who are absolutely dependent on this method. If the kids won't eat veggies, well, just sneak them into the foods they're already eating! Hide them in sweet things or blend them into the meatloaf! They'll never know the difference!I may be over-analyzing here, but have you ever thought about what message you're sending your kids? Sure, they may not know right now that you've hidden spinach in their smoothie or zucchini in their muffins, but someday they will. And when they do realize it, on some unconscious level they may internalize this message: Vegetables aren't worth eating on their own. If they haven't been eating vegetables and enjoying them for what they are when they're young, they're probably not going to just suddenly doing so when they get older. Hiding vegetables does not teach kids to like vegetables, and it does not teach kids to eat healthy. On some unconscious level, they may believe vegetables don't taste good. Vegetables have a weird texture. Vegetables are not something to snack on, something to voluntarily put on your pizza, or one of the best side dishes at big holiday meals.
Wait a second, you say! What was that you were just saying about sticking veggies in pasta sauce and smoothies? Isn't that hiding them? Remember that while there is nothing wrong with using vegetables creatively, it benefits everyone when your family knows exactly what is in the foods you serve to them. Go ahead and toss a big handful of spinach into the smoothie before blending it; just make sure that you don't keep it a secret from your child. Someday, they may grow to think that all smoothies benefit from a healthy handful of greens!
On another note, am I the only one who feels like hiding veggies in regular foods is pretty close to lying to them? Lying by omission perhaps, but however you want to define it, it is being dishonest. And most parents want their kids to learn that any kind of dishonesty is not okay, no matter how well-meaning.
Involve them in cooking.
When a child helps to prepare a food, they're more likely to want to eat the finished meal. Get them invested in mealtime by getting them into the kitchen! For really young babies try starting with just bringing them into the kitchen while you're cooking - a safe distance away from anything dangerous, of course - and talking to them about the process. After they get good at gripping things, toddlers can start to get involved with the actual process of cooking. Bake things together; you can measure out ingredients and baby can dump them into the bowl, and then help with stirring. Let your child help you dump veggies in the pan (before you actually turn on the heat). By the age of 4 or 5, you can even let them help you with chopping up certain veggies; look for special knives for kids that don't easily cut skin. The older a child gets, the more involved they can be with cooking.Another idea? Get your child's input when it comes to what you're making for dinner. Offer them a few choices, but let them actually select the meal. Or try exploring cookbooks together; let them look at the pictures and tell them about what the dish might taste like. If you do meal planning, let them help you select some of the foods you're making every week (within reason, of course!).
Look outside the grocery store.
There are so many places where you can get fresh produce other than at your neighborhood grocery store. And often, those other places will have produce that is fresher and tastes better, not to mention a wider variety. One great option is a farmers' market, where you will find a great variety of fresh fruits, veggies, and herbs, as well as other things like freshly baked breads, cheeses, eggs, and more. Did I mention that many vendors at farmers' markets offer free samples? Sometimes the mere fact that a taste of the food is free, and not being offered by mom, is enough to convince a child to try something.Or maybe you could consider joining a CSA (community-supported agriculture) project. Most CSAs offer a box of fresh produce weekly or bi-weekly, delivered either to your door or to a convenient drop location. CSAs also offer a wide variety of produce, freshly-harvested, including more "normal" foods (expect a ton of zucchini in the summer months) as well as less common types (I've been a member of many CSAs over the years, and there are a lot of fruits and veggies I've tried for the first time because they were in my box that week). Kids love unpacking the box every week and seeing what's inside. Parents are determined to use everything and not let anything go to waste, while children are intrigued by exotic produce and (hopefully) want to sample it all.
Farm stands also have a lot to offer; sure, you have to drive to the farm, but you also know that everything was picked fresh. Or look for local u-pick farms, where you can harvest berries or apples or other produce; you have to pick it yourself, but the produce costs less than anything you can buy in a store and tastes much better. Plus, there's something about the process that just draws children in. Make a family event of it!
Let them pick them out something they want to try.
Have you ever tried letting your child pick out a veggie to go with dinner? Sometimes having a say in what's going to be on the table can make a big difference in whether or not a child is going to want to eat it. So consider involving your little ones in the meal planning; let them choose what veggies are going to be served with dinner. Or just go to the store and explore the produce aisles together. Maybe you can give some of the more unusual types of produce a try. Or maybe you can try the unusual varieties of "normal" produce. Even our local Albertson's carries purple and orange cauliflower; they taste the same as regular cauliflower, but the bright colors might be what it takes to encourage kids to give them a try.Or start a garden and grow them yourself!
This is one area where I don't have much personal experience; I've always had a bit of a brown thumb, and we've lived in apartments since my son was born anyway. But recently, I picked up a "make your own pizza garden" kit from the store, and my son was absolutely enthralled. It's really just a tiny herb garden, featuring basil, oregano, and parsley, but he loved helping me dump soil in the pot, poking holes for the seeds, gently covering them up. He looks forward to watering it every day or two. He always wants to sit outside and watch things grow. And eventually, when those basil sprouts turn into bigger plants, we'll harvest some together and make a fine batch of pesto, and I have a feeling my son will just gobble it up.Getting children involved in gardening has so many benefits. It gets them outside and sets them up for a great hobby. It gives them a great excuse to get dirty. It helps them to work on their patience, since plants take a long time to grow. And by helping to create the food, kids have a vested interest in eating the results. Don't be surprised if your budding gardener is much more likely to eat those veggies he helped nurture.
This post has been shared at the Healthy, Happy, Green, & Natural Party Blog Hop on 4/21/2015.
Saturday, March 14, 2015
Vegan Pumpkin Cream Pie
Today: 3/14/15
Pi: 3.1415(9265358979323)
Clearly, this calls for some pie. Because in this household, we celebrate pi with pie.
In this case, pumpkin cream pie! Why? Because I have frozen pumpkin puree galore in my freezer right now, leftover from last fall, and this seems like a good opportunity to use it. Also, because I once tried this AMAZING recipe for pumpkin cream pie, the first time I had ever heard of such a thing actually, and ever since then I've been wondering if it would be possible to make something similar that did not have the Jello pudding mix but still tasted amazing.
It's not that I'm overtly against Jello pudding mix. Well, actually, I might be. I'm not entirely fond of the ingredients list (Carrageenan, food dyes, and artificial flavors? No thank you!), but my issues with processed food are a topic for another day.
So I set out to make my own version. A vegan version. But I was feeling picky about how I wanted to veganize it. I did not want to make something that used tofu, although I know from my own past experience that tofu can make for some pretty amazing desserts. And while that Jello pudding mix technically doesn't have any dairy in it (that I can see, anyway), I worried that simply using nondairy milk to make it would not result in the same rich pie filling that I loved so much the first time around.
The solution? Coconut cream, of course! Canned coconut cream adds that depth of flavor that I wanted, but also didn't add an overtly coconut flavor to the dessert. Make sure you get canned coconut cream; refrigerated coconut milk-based coffee creamer is not what you want. You can get straight coconut cream in cans at Trader Joe's or Whole Foods, possibly in other health food stores. Or you can just buy a can of full fat coconut milk, refrigerate it for a day or two, and then open it without shaking it up first; the coconut cream will have separated to the top, and you can scoop it out and use it! But you'll need 2-3 cans, I imagine, to get the 1¼ cups total coconut cream needed for this recipe.)
So yes, this recipe is dairy free, soy free (unless you use soy milk), egg free. Could potentially be gluten free if you found gluten free graham crackers for the crust (or just went with some other gluten free pie crust).
I also wanted there to be more actual pumpkin in here. The original recipe only had a half cup, for crying out loud! What kind of pumpkin pie only has a half cup of pumpkin in it? Surely I could fit a bit more. I do love putting vegetables into my desserts, after all, and it turns out that putting in twice as much pumpkin only made this pie better.
For nondairy milk, I used a blend that was coconut milk and almond milk, but I imagine you could use most any nondairy milk you like. I used a plain variety, but I guess if you like sweet you could probably use some of that vanilla flavored extra sweet stuff.
Next time I make this pie, I may experiment with adding more spices; the original recipe is very lightly spiced, and this is tasty, but sometimes you just want that full autumn spice experience.
Last note: I am not including a recipe here for graham cracker crust, since mine always come out terrible. Meaning, they taste great, but they're crumbly and don't hold together well. (I can make an amazing pastry crust though!) But really, it's super easy to veganize any recipe for graham cracker crust. Just make sure that your graham crackers are, in fact, vegan, and then use either coconut oil (my choice) or Earth Balance (or other vegan margarine, although I'm not a fan of most margarine either) in place of the butter.
Vegan Pumpkin Cream Pie
Inspired by the Pumpkin Cream Pie recipe from The Pioneer Womanvegan graham cracker crust (use recipe of your choice)
¾ cup coconut cream
¾ cup nondairy milk
3 tablespoons cornstarch
¼ cup sugar
dash salt
pinch cinnamon
pinch nutmeg
pinch ground cloves
¾ teaspoon vanilla extract
1 cup pumpkin puree
½ cup coconut cream
In a medium saucepan, whisk together cornstarch, sugar, salt, and spices. Slowly whisk in ¾ cup coconut cream and nondairy milk. Bring to a boil over medium-low heat, stirring continuously (it might get lumpy if you stop stirring), until mixture starts to thicken (10-15 minutes). Continue to cook and stir until the mixture is good and thick, another couple of minutes. Stir in vanilla extract. Stir in pumpkin puree. Put a lid on the pot and set it aside to cool. When it's cool enough, put the pot in the fridge so that the mixture can cool completely.
When mixture is cool, remove it from the fridge. In a mixing bowl, add ½ cup coconut cream and beat until peaks start to form. Fold the pumpkin cream mixture into the whipped coconut cream until combined. Pour into graham cracker crust.
Cover and refrigerate for at least 2-3 hours, preferably overnight. If desired, crumble additional graham crackers on top before serving.
This post was shared at the Healthy, Happy, Green, & Natural Party Blog Hop on 3/10/2015.
Tuesday, January 27, 2015
Vegan Spaghetti Squash Bread
When I had an office job, I used to delight in baking things to share with my coworkers.
It was win for everyone. I got to bake yummy food, which always made me happy. My husband got to sample said yummy foods (to make sure nothing was poisonous, of course), so he was happy. We didn't end up with an excess of yummy foods sitting in the fridge, making us hungry and tempting us to binge, which made both of us happy. My coworkers got to eat yummy food, which made them happy. And office morale improved, which made my bosses happy.
Many of my coworkers had religious restrictions against eggs on certain days, so I got into the habit of making nearly all of my treats vegan. It actually wasn't difficult to adjust to at all, and it made my life easier too; no eggs in the fridge = no problem! (And I hardly ever had eggs on hand; we just didn't eat them very often. So this was a good thing.)
Eventually, I kind of got into the habit of baking things that had fruits and veggies in them. It started with banana bread, no doubt; you can't go wrong with banana bread, since everyone loves it. Next came zucchini bread; everyone loved it, and I was hooked. Pumpkins, apples, carrots, pineapple, coconut, and even green tomatoes found their way into the things I baked. It got to the point where I'd bring food in, and people would ask me "So what's in it this time?"
It was fun. Really, really fun. And I still have not gotten tired of adding as many fruits and veggies as possible to things I bake.
And so last week, Bug and I baked up some spaghetti squash bread.
| The best part of baking vegan? Absolutely no worries about eating the batter! |
Hear me out here. I know it sounds weird. But pumpkin bread is a fall favorite. Butternut squash and other hard winter squashes can be made into muffins and pies and all kinds of yummy things. People don't even bat an eye at chocolate zucchini cake. (Or maybe that's just the people *I* know.) So why not turn spaghetti squash into a delicious baked treat? Don't leave spaghetti squash out in the cold just because it's got a weird texture.
I swear, the stuff just melts right into bread; it doesn't taste funny, and if you chop the cooked squash up before mixing it in, you can't find any little strands anywhere. This bread is delicious, and received full approval from my husband, my friends, and, perhaps most importantly, from Bug.
| Bug wanted to get in on the picture taking action. |
Spaghetti Squash Bread
1 cup whole wheat flour
½ cup all purpose flour
½ teaspoon salt
1 teaspoon baking powder
½ teaspoon baking soda
1 teaspoon cinnamon
¼ teaspoon nutmeg
1 ripe banana
¼ cup applesauce (unsweetened)
¼ cup canola or coconut oil
1 teaspoon vanilla extract
½ cup brown sugar
1 tablespoon ground flax seed
1 cup spaghetti squash
Note: Spaghetti squash needs to be cooked. You can microwave it whole for 10 minutes or until fork tender, or you can chop in half and bake at 350° F for 30-45 minutes. Remove seeds and use a fork to separate it into strands. You may want to chop it up some before using it to bake, if you think the long strands might weird you out. Or you could probably puree it.
Preheat oven to 350° F.
In a large bowl, mix together all dry ingredients (flours, salt, baking powder, baking soda, cinnamon, nutmeg).
In a smaller bowl, cream together banana, applesauce, oil, vanilla, sugar, and flax seed. (I used an immersion blender for this, although a fork should suffice, especially if the banana is good and ripe.) Dump into the dry ingredients, along with the spaghetti squash, and mix until just incorporated; some lumps are definitely okay, and as this is a quick bread, overmixing is bad. (Mine, however, did get a little overmixed, as Bug was the one doing the mixing. And it still came out just fine!) Fold in walnuts, if using.
Pour into prepared loaf pan and bake for 45-50 minutes, until golden on top and done all the way through (poke with a knife to make sure). Transfer to a wire rack to cool. Let cool for as long as you can stand to before slicing. Enjoy!
This post is shared at the Healthy, Happy, Green, & Natural Party Hop on 1/27/2015 and Real Food Wednesday at Kelly the Kitchen Kop on 1/28/2015.
Thursday, December 4, 2014
Butternut Spinach Soup
A few weeks ago, I had about half of a roasted butternut squash languishing in my fridge, just begging to be made into soup.
I also had the rather sad-looking remains of a tub of baby spinach. It wasn't bad, per se, but it definitely needed to be used quickly.
So what's a hungry girl to do? Make soup, of course! I dreamed this up while walking home from the library with Bug. You can't go wrong with winter squash and spinach, right? This soup was creamy and delicious; the nutritional yeast and peanut butter added (vegan) cheesiness and a slightly nutty flavor that was not in the least bit overpowering (it didn't taste like peanuts at all!).
Curry powder completed the deal. I almost always add curry powder to regular butternut squash soup (trust me, it's amazing!), and it was definitely vital here.
I've made this soup a couple of times now, with several different kinds of winter squash, and it's been delicious every time!
1 c broth or water
2 c cooked butternut squash chunks
4 c spinach
½ tsp onion powder
½ tsp garlic powder
1 tbsp nutritional yeast
1 tbsp peanut butter
½ - 1 tsp curry powder
salt/pepper to taste
Warm broth in a medium pan; add other ingredients and heat until spinach has wilted. Then toss the whole thing in a blender (or use an immersion blender) and blend until smooth. Add curry powder to taste; mine is hot curry powder, so I didn't add that much, but you might want to add more if yours is milder. Taste and add additional curry powder if desired, plus salt and/or pepper to taste.
Serves 2-3. Or 1, if you're feeling particularly gluttonous.
This post is shared at the Special Holiday Edition: Healthy, Happy, Green & Natural Party Hop.
I also had the rather sad-looking remains of a tub of baby spinach. It wasn't bad, per se, but it definitely needed to be used quickly.
So what's a hungry girl to do? Make soup, of course! I dreamed this up while walking home from the library with Bug. You can't go wrong with winter squash and spinach, right? This soup was creamy and delicious; the nutritional yeast and peanut butter added (vegan) cheesiness and a slightly nutty flavor that was not in the least bit overpowering (it didn't taste like peanuts at all!).
Curry powder completed the deal. I almost always add curry powder to regular butternut squash soup (trust me, it's amazing!), and it was definitely vital here.
I've made this soup a couple of times now, with several different kinds of winter squash, and it's been delicious every time!
Butternut Spinach Soup
1 c broth or water
2 c cooked butternut squash chunks
4 c spinach
½ tsp onion powder
½ tsp garlic powder
1 tbsp nutritional yeast
1 tbsp peanut butter
½ - 1 tsp curry powder
salt/pepper to taste
Warm broth in a medium pan; add other ingredients and heat until spinach has wilted. Then toss the whole thing in a blender (or use an immersion blender) and blend until smooth. Add curry powder to taste; mine is hot curry powder, so I didn't add that much, but you might want to add more if yours is milder. Taste and add additional curry powder if desired, plus salt and/or pepper to taste.
Serves 2-3. Or 1, if you're feeling particularly gluttonous.
This post is shared at the Special Holiday Edition: Healthy, Happy, Green & Natural Party Hop.
Wednesday, October 22, 2014
Simple Marinara Sauce
My little boy loves pasta. Absolutely loves it. He would eat it for lunch every day if he could.
To be fair, I love pasta too, as does my husband. So not surprisingly, pasta with a basic (but delicious!) marinara sauce is one of the staple meals of our home.
I almost always have the ingredients to make this simple tomato sauce on hand. It's great on any kind of pasta, and I have also used it in lasagna and on pizza.
1 med. onion, diced
2-6 cloves garlic, minced
2 (14.5-oz.) cans OR 1 (28-oz.) can diced tomatoes
1 (6-oz.) can tomato paste
Italian herb blend to taste (mine has oregano, basil, marjoram, thyme, and rosemary)
salt & pepper to taste
Heat olive oil in a large skillet over medium-high heat. Add onion and garlic, and saute until soft and translucent.
Put onion and garlic into a blender. Add 1 can tomatoes (or half of 28-oz. can) and tomato paste. Blend until smooth.
Return to skillet. Add remaining tomatoes and stir to incorporate. Add Italian herbs to taste. Heat over medium-low heat until thoroughly warm. Add additional Italian herbs if desired, and season to taste with salt and pepper. Enjoy!
Oil-Free/Fat-Free. I usually use olive oil because I think it adds to the overall flavor of the sauce. And who doesn't love the smell of onions and garlic cooking in olive oil?! But you can just as easily cook the onions and garlic in plain water or vegetable broth if you want to have a fat-free sauce.
Extra Veggies. I love adding extra vegetables to this sauce! Mushrooms can be sauteed separately and added to the sauce after blending. Zucchini/summer squash can also be sauteed separately and then added after blending. Greens can be chopped (spinach, chard, KALE?!) (if using a sturdier green, chop it finely to make sure it cooks quickly in the sauce) and added in after blending; keep the heat on until they wilt. A carrot or two can be diced and cooked with the onions and garlic and then blended in; this mostly adds sweetness, and usually doesn't affect the final color or add a noticeable carroty flavor. (If you're one of those people who hides vegetables in their kids' foods--which I am not--this is good to know.) Peel an eggplant and salt/sweat it prior to beginning the sauce; saute it with the onion and garlic, and then blend as usual. I have even been known to slip in a little bit of pumpkin puree on occasion, when I have a tiny odd amount languishing in my fridge.
Extra Protein. Add 1/2 cup cooked red lentils or 1 cup cooked chickpeas before blending to add texture and extra protein. Or add the chickpeas after; I love chickpeas with marinara sauce, and this works great with a chunkier pasta shape.
This post is linked to Kelly the Kitchen Kop's Real Food Wednesday blog carnival on 10/22/2014.
To be fair, I love pasta too, as does my husband. So not surprisingly, pasta with a basic (but delicious!) marinara sauce is one of the staple meals of our home.
I almost always have the ingredients to make this simple tomato sauce on hand. It's great on any kind of pasta, and I have also used it in lasagna and on pizza.
Simple Marinara Sauce
1 tbsp. olive oil1 med. onion, diced
2-6 cloves garlic, minced
2 (14.5-oz.) cans OR 1 (28-oz.) can diced tomatoes
1 (6-oz.) can tomato paste
Italian herb blend to taste (mine has oregano, basil, marjoram, thyme, and rosemary)
salt & pepper to taste
Heat olive oil in a large skillet over medium-high heat. Add onion and garlic, and saute until soft and translucent.
Put onion and garlic into a blender. Add 1 can tomatoes (or half of 28-oz. can) and tomato paste. Blend until smooth.
Return to skillet. Add remaining tomatoes and stir to incorporate. Add Italian herbs to taste. Heat over medium-low heat until thoroughly warm. Add additional Italian herbs if desired, and season to taste with salt and pepper. Enjoy!
Variations:
Non-Chunky. I always reserve half of the tomatoes before blending, then add in after because I like noticeable chunks of tomato in my sauce. But you can also blend all of the tomatoes for a smoother sauce.Oil-Free/Fat-Free. I usually use olive oil because I think it adds to the overall flavor of the sauce. And who doesn't love the smell of onions and garlic cooking in olive oil?! But you can just as easily cook the onions and garlic in plain water or vegetable broth if you want to have a fat-free sauce.
Extra Veggies. I love adding extra vegetables to this sauce! Mushrooms can be sauteed separately and added to the sauce after blending. Zucchini/summer squash can also be sauteed separately and then added after blending. Greens can be chopped (spinach, chard, KALE?!) (if using a sturdier green, chop it finely to make sure it cooks quickly in the sauce) and added in after blending; keep the heat on until they wilt. A carrot or two can be diced and cooked with the onions and garlic and then blended in; this mostly adds sweetness, and usually doesn't affect the final color or add a noticeable carroty flavor. (If you're one of those people who hides vegetables in their kids' foods--which I am not--this is good to know.) Peel an eggplant and salt/sweat it prior to beginning the sauce; saute it with the onion and garlic, and then blend as usual. I have even been known to slip in a little bit of pumpkin puree on occasion, when I have a tiny odd amount languishing in my fridge.
Extra Protein. Add 1/2 cup cooked red lentils or 1 cup cooked chickpeas before blending to add texture and extra protein. Or add the chickpeas after; I love chickpeas with marinara sauce, and this works great with a chunkier pasta shape.
This post is linked to Kelly the Kitchen Kop's Real Food Wednesday blog carnival on 10/22/2014.
Monday, September 15, 2014
Pumpkin Cornbread Muffins
Is it too early for pumpkin everything?
It's technically almost autumn, although here in San Diego the weather doesn't seem to have gotten that memo. It has been ridiculously hot and humid these past few days. Temperatures in the nineties, humidity that makes it pretty much unbearable to be outside after 9:00 A.M. or so. (Unless you're in a swimming pool, which is where we spent a good chunk of our morning.) And we, unfortunately, currently live in an apartment without central air. And it's a "reduce your use" day, according to SDG&E, so I can't even sit in front of our little A/C unit all day in good conscience. Sigh.
Thankfully, we got our baking out of the way early this morning. We *always* get up early; Little Bug rarely sleeps in past 6 these days. (What am I talking about?? I don't know that he's ever reliably slept in...) And since we were expecting company, baking some treats seemed like a good plan.
Actually, baking yummy treats is ALWAYS a good plan. Company or not. Just sayin'.
1 cup flour
¾ cup cornmeal
1 teaspoon baking powder
½ teaspoon baking soda
¾ teaspoon pumpkin pie spice
¼ teaspoon salt
1 cup pumpkin puree
¼ - ½ cup brown sugar
1 tablespoon vegetable oil
3 tablespoons applesauce
Preheat oven to 425° F.
In a large bowl, mix flour, cornmeal, baking powder, baking soda, pumpkin pie spice, and salt. (The spice isn't especially strong in these muffins, so if you like a stronger spice flavor you might consider adding a full teaspoon of pumpkin spice or even more. Or, of course, feel free to create your own blend of cinnamon, cloves, nutmeg, allspice, etc., in whatever proportions please you!)
In a smaller bowl, combine pumpkin, brown sugar, oil, and applesauce. (Note that I like at least a little bit of oil in my baked goods; I am generally not a fan of the texture of muffins that have no fat at all. That being said, if that doesn't bother you, these would probably be pretty tasty with extra applesauce subbed in for that last bit of oil, if you so desire.) Add to dry ingredients and mix until just blended; lumps are fine, and it's okay if there are occasional patches of dry ingredients. Pour into a prepared muffin tin.
Bake 13-14 minutes, until muffins are golden on top and a toothpick or knife inserted into one comes out clean.
It's technically almost autumn, although here in San Diego the weather doesn't seem to have gotten that memo. It has been ridiculously hot and humid these past few days. Temperatures in the nineties, humidity that makes it pretty much unbearable to be outside after 9:00 A.M. or so. (Unless you're in a swimming pool, which is where we spent a good chunk of our morning.) And we, unfortunately, currently live in an apartment without central air. And it's a "reduce your use" day, according to SDG&E, so I can't even sit in front of our little A/C unit all day in good conscience. Sigh.
Thankfully, we got our baking out of the way early this morning. We *always* get up early; Little Bug rarely sleeps in past 6 these days. (What am I talking about?? I don't know that he's ever reliably slept in...) And since we were expecting company, baking some treats seemed like a good plan.
Actually, baking yummy treats is ALWAYS a good plan. Company or not. Just sayin'.
Pumpkin Cornbread Muffins
1 cup flour
¾ cup cornmeal
1 teaspoon baking powder
½ teaspoon baking soda
¾ teaspoon pumpkin pie spice
¼ teaspoon salt
1 cup pumpkin puree
¼ - ½ cup brown sugar
1 tablespoon vegetable oil
3 tablespoons applesauce
Preheat oven to 425° F.
In a large bowl, mix flour, cornmeal, baking powder, baking soda, pumpkin pie spice, and salt. (The spice isn't especially strong in these muffins, so if you like a stronger spice flavor you might consider adding a full teaspoon of pumpkin spice or even more. Or, of course, feel free to create your own blend of cinnamon, cloves, nutmeg, allspice, etc., in whatever proportions please you!)
In a smaller bowl, combine pumpkin, brown sugar, oil, and applesauce. (Note that I like at least a little bit of oil in my baked goods; I am generally not a fan of the texture of muffins that have no fat at all. That being said, if that doesn't bother you, these would probably be pretty tasty with extra applesauce subbed in for that last bit of oil, if you so desire.) Add to dry ingredients and mix until just blended; lumps are fine, and it's okay if there are occasional patches of dry ingredients. Pour into a prepared muffin tin.
Bake 13-14 minutes, until muffins are golden on top and a toothpick or knife inserted into one comes out clean.
Wednesday, September 3, 2014
Getting Ample Protein During Your Vegetarian Pregnancy
(It's Not as Hard as You Might Think!)
Everyone knows that your nutrient needs go up during pregnancy, but did you know that your protein requirement practically doubles? Most sources say that a pregnant woman should be getting at least 80 grams of protein per day! Are you getting enough?
Some vegetarians find it especially difficult to meet these numbers; I know I certainly did! With patience and much time spent working with my diet (and keeping an accurate food journal), I was able to get there, and you can too. It is easier to adequately meet your protein needs if you eat eggs and dairy, but the diligent vegan can accomplish it too.
Running low on ideas? Here are some vegetarian ideas to bump up your protein intake. (And note that all of these protein counts may vary depending on what brand you buy.)
- Quinoa: Technically a seed, quinoa cooks up like a grain and has a wonderful taste that most people enjoy just fine. It's also worth noting that quinoa contains complete protein, meaning it has all of the essential amino acids that our bodies cannot produce on their own. A cup of cooked quinoa usually has around 12 grams of protein.
- Beans: Yes. Eat lots of these. A cup of pinto or black beans has 14 grams of protein, a cup of garbanzo beans has 12 grams, and a cup of kidney beans has 13 grams.
- Lentils: A cup of cooked green lentils has about 18 grams of protein.
- Tofu and Tempeh: A serving of tofu, usually about 3 ounces, has 7-9 grams of protein, depending on the brand and firmness. Tempeh is even better; a 4 ounce serving has 20-24 grams of protein.
- Oatmeal: A fantastic way to start off your day; a cup cooked averages about 7 grams of protein. Better yet, you can add toppings to boost that even further! I always top mine with walnuts, ground flaxseed, and chia seed, among other things.
- Other Whole Grains: You're going to eat bread and pasta anyway; choose whole grain! Not only is it better for your blood sugar, but whole grains have a lot more protein than refined grains.
- Veggies: Wait, vegetables have protein? Of course they do! You should be trying to eat a rainbow of veggies every day, but some especially good options for protein are green peas (8 grams/1 cup), corn (4-5 grams/1 cup), spinach (5 grams/1 cup cooked), and Brussels sprouts (4 grams/cup).
- Nut and Seed Butters: Spread 'em on toast, crackers, celery, apples, or whatever you want! I buy ones that have no added sugars, salt, or oil (and definitely no hydrogenated oils!). Try peanut butter (7 grams/2 tablespoons), sunflower seed butter (9 grams/2 tablespoons), almond butter (7 grams/2 tablespoons), or cashew butter (5 grams/2 tablespoons).
- Nuts and Seeds: I prefer completely raw, but roasted are still a good option (be wary of too much added seasoning though). Try peanuts (7 grams/1 ounce), almonds (6 grams/1 ounce), pumpkin seeds (8 grams/1 ounce), cashews (5 grams/1 ounce), or sunflower seeds (6 grams/1 ounce). Or try store-bought nut mixes if you like variety!
- Greek Yogurt: Sure, regular yogurt has protein too, but Greek yogurt usually has about twice as much. It did wonders for my diet! Plain, with fresh fruit or honey mixed in, or blended into smoothies were all delicious. Most brands have 20-24 grams of protein in a cup.
- Eggs: A single egg has about 6 grams of protein.
- Cheese: Whether you snack on cubes or use it as a topping, cheese is delicious! Most cheeses have about 7 grams of protein in a 1 ounce serving.
- Dr Bill & Martha's Pregnancy Super-Smoothie appears both on their website and in The Healthy Pregnancy Book. The recipe makes 8 cups with a total of 50-70 grams protein, depending on what exact ingredients you use.
- Jumbo Chickpea Pancakes from OhSheGlows are a completely vegan option good for more than just breakfast; one large pancake contains 14-15 grams of protein, and can be topped with other goodies to increase the count further.
- Sweet Potato Dal from Happy Herbivore (also appearing in Lindsay Nixon's Book Everyday Happy Herbivore) packs 15.4 grams of protein in each serving. I absolutely love this recipe!
- Nutritious Cookies and Pancakes from MyBreechBaby don't give a specific amount of protein per serving, but both recipes contain plenty of high-protein ingredients and are a delicious and nutritious addition to your diet.
- Flax Nutmeg Pancakes from Penzey's Spices packs 13 grams of protein into 1/5 of the recipe.
- Lentil Stew, also from Penzey's Spices, is deliciously savory with 9 grams of protein per 1 cup serving.
- Smoky Split Pea Soup from Vegetarian Times Magazine has 9 grams of protein per 1 cup serving.
- Quinoa and Red Lentil Cutlets from FatFree Vegan Kitchen are delicious, and have 22 grams of protein per serving! I make these for Thanksgiving every year.
- Thanksgiving Meatless Loaf, also from FatFree Vegan Kitchen, packs 19 grams of protein per serving, and is one of the best meatless loaves I've ever made.
- Super "Meaty" Chili with TVP is featured in The Everything Vegan Cookbook. I normally don't do much with TVP, but my husband loves this chili and I enjoy its hearty texture, especially on a cold day. One serving has 20 grams of protein.
- Hummus is readily available in any grocery store, or you can try making your own with this recipe from AllRecipes. One quarter of the recipe has 8 grams of protein.
- Peanut Butter Banana Wraps are one of my favorite breakfasts on the go. Take one whole grain tortilla, spread with peanut butter (or nut butter of your choice), and wrap it around a banana. Protein count will depend on your specific ingredients; the ones I make average about 12 grams.
Subscribe to:
Posts (Atom)